Google want you to buy Workspace, but that costs money. It's possible to send and receive emails with a custom email domain for free without Workspace.
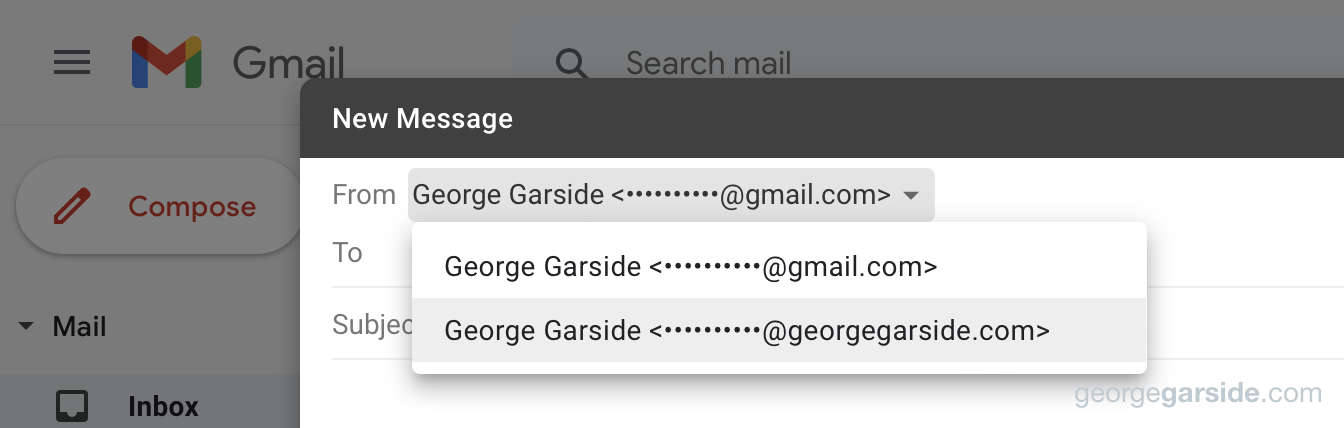
Once you've finished the steps in this post, at the top of every email compose view, you'll have the option to choose which email address you want the email to come from.
Receiving email at your custom domain
Before Gmail will let you send email from your custom domain, it needs to be able to receive emails. In the next section setting up sending email, Gmail will send a verification code to the email address to verify ownership.
There are a few ways to achieve this step. You need to have emails forwarded while keeping the existing headers on the email, so the destination address retains the custom domain. I've used these two ways of doing this.
Google Domains email forwarding
If your domain name is purchased with Google Domains, they provide free email forwarding that persists the original envelope.
- From your Google Domains dashboard, choose Email.
- Under ‘Email forwarding’, click ‘Add email alias’.
- Enter an email address you want to be able to send email as for your custom domain.
- Enter your Gmail email address as the destination.
If you're not using the Google Domains name servers, you'll have a warning at the top of the page.
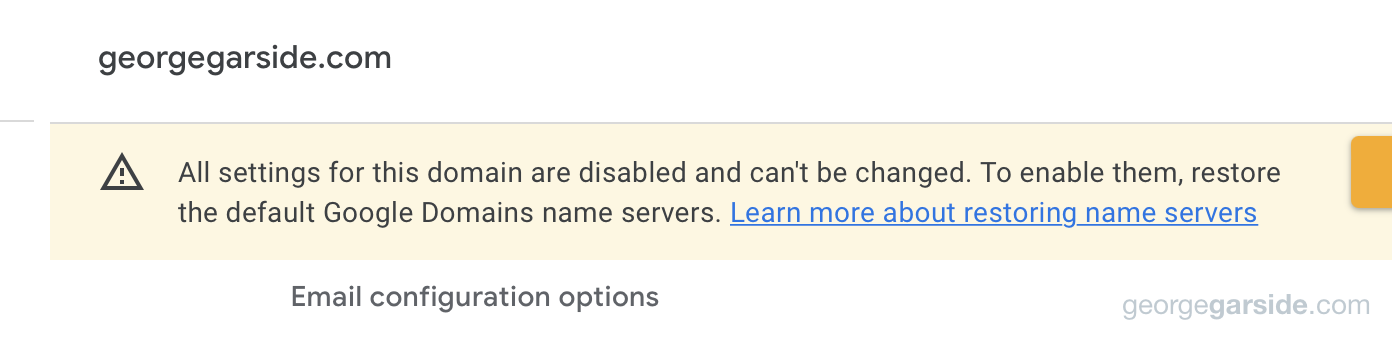
You don't have to comply though — I have my domain through Cloudflare using their name servers, but still use Google's email forwarding since I set it up before Cloudflare's offering existed. In this case, you'll need to manually add the DNS records for Google's email forwarding.
| Type | Host | Value | Priority |
|---|---|---|---|
| MX | @ | gmr-smtp-in.l.google.com | 5 |
| MX | @ | alt1.gmr-smtp-in.l.google.com | 10 |
| MX | @ | alt2.gmr-smtp-in.l.google.com | 20 |
| MX | @ | alt3.gmr-smtp-in.l.google.com | 30 |
| MX | @ | alt4.gmr-smtp-in.l.google.com | 40 |
If you're doing this as your name servers aren't with Google, you'll need to add these DNS records to whichever provider you're using. For example, if you're using Cloudflare, it'll look something like this:

Cloudflare email routing
For any domain managed by Cloudflare, including their free offering, they offer email routing.
- From your Cloudflare dashboard, choose Email.
- Enter an email address you want to be able to send email as for your custom domain.
- Enter your Gmail email address as the destination.
Emails sent to your new email address on your custom domain will be forwarded to your Gmail account, and the ‘To’ field will still show your custom domain.
To test this forwarding, send an email to your custom domain email address from a different account, not your Gmail account that you set up forwarding to. Google won't show the email in your inbox when it's sent from your forwarding destination address. Send an email from some completely unrelated account and check that you receive an email in your inbox.
If you send an email from your Gmail account to your domain's custom email address, Gmail might auto-archive the message since the sender and recipient are the same. Adjust your Gmail settings to create filters that will help prevent that.
Sending from a custom domain
Start at your Gmail ‘Accounts and Import’ settings: https://mail.google.com/mail/u/0/#settings/accounts
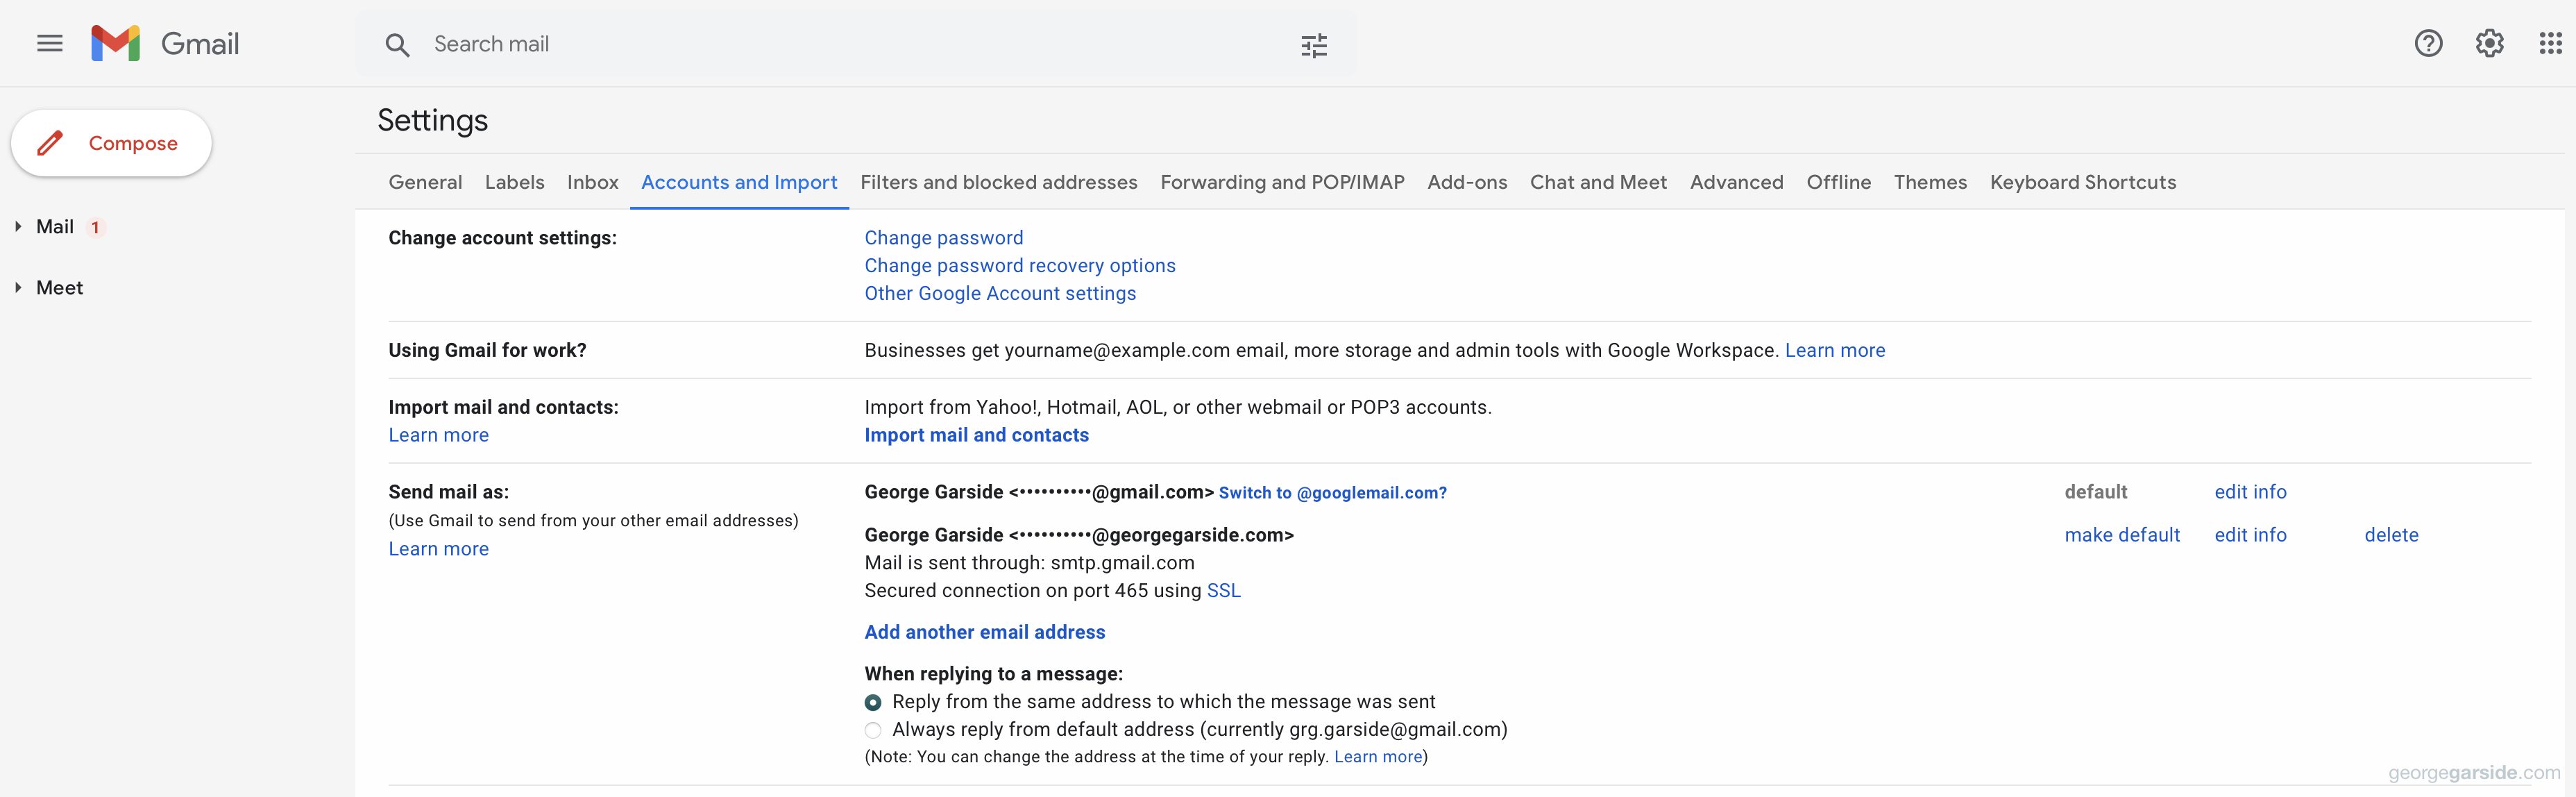
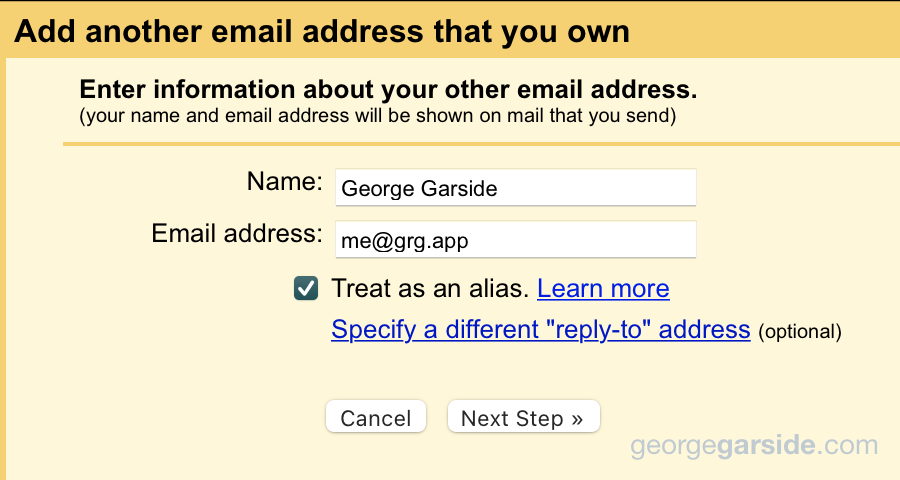
Under ‘Send mail as’, choose ‘Add another email address’.
Enter the email address you want to use with your custom domain, and keep ‘Treat as an alias’ checked.
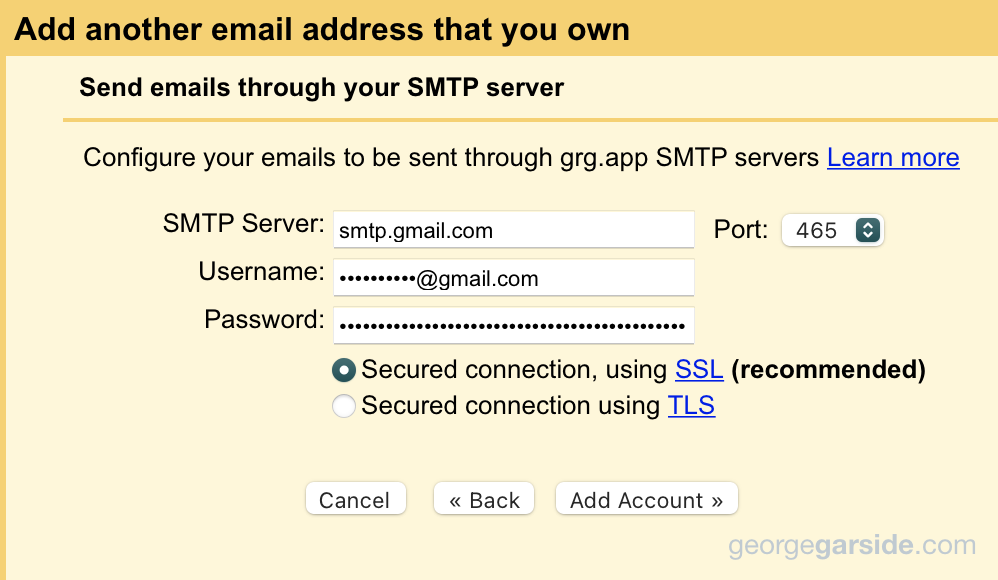
When prompted to enter SMTP server details, enter Gmail's SMTP settings:
- SMTP Server:
smtp.gmail.com - Port: 465 (not the default!)
- Username: your normal Gmail email address
- Password: generate an App Password at https://myaccount.google.com/u/0/apppasswords
- Secured connection, using SSL
If Google can automatically verify you own the domain name you gave, you're done! If not, you'll receive an email from Google asking you to verify the email address. From the previous section, you set up email forwarding, so this email will come to your Gmail. Follow the steps in the email to verify your new email address.
Using your custom domain
Now you're able to choose your new email address as your From address in new emails!
To make your custom domain the default email address used for new emails, click the ‘make default’ link beside your new email address in your Gmail ‘Accounts and Imports’ settings.
You can also separately choose whether to use your default, or reply with whichever the email was sent to, using the radio buttons in the same section of settings, titled ‘when replying to a message’.
I like to make it easier to identify emails sent to my custom domain by applying a label automatically using a filter in Gmail. You can create a filter from the search field in Gmail, such as to:<domain> like to:georgegarside.com and ‘create filter’. Choose your preferred action, such as applying a label.
Leave a Reply