Another year, another disappointing macOS release. With the only real feature being APFS and the great(!) things that come with it like no read/write in Boot Camp and no directory hard links and no deduplication, I was excited to go looking for other features and changes with this macOS release. Unfortunately with High Sierra, there wasn't even that many hidden features unlike last time with Sierra, which was yet another disappointment as sometimes these features are more useful to me on a daily basis than flagship features introduced at the keynote. Never mind, another year and another go, here's the hidden features and underdocumented changes in macOS High Sierra from Sierra.
Touch Bar
Colour picker
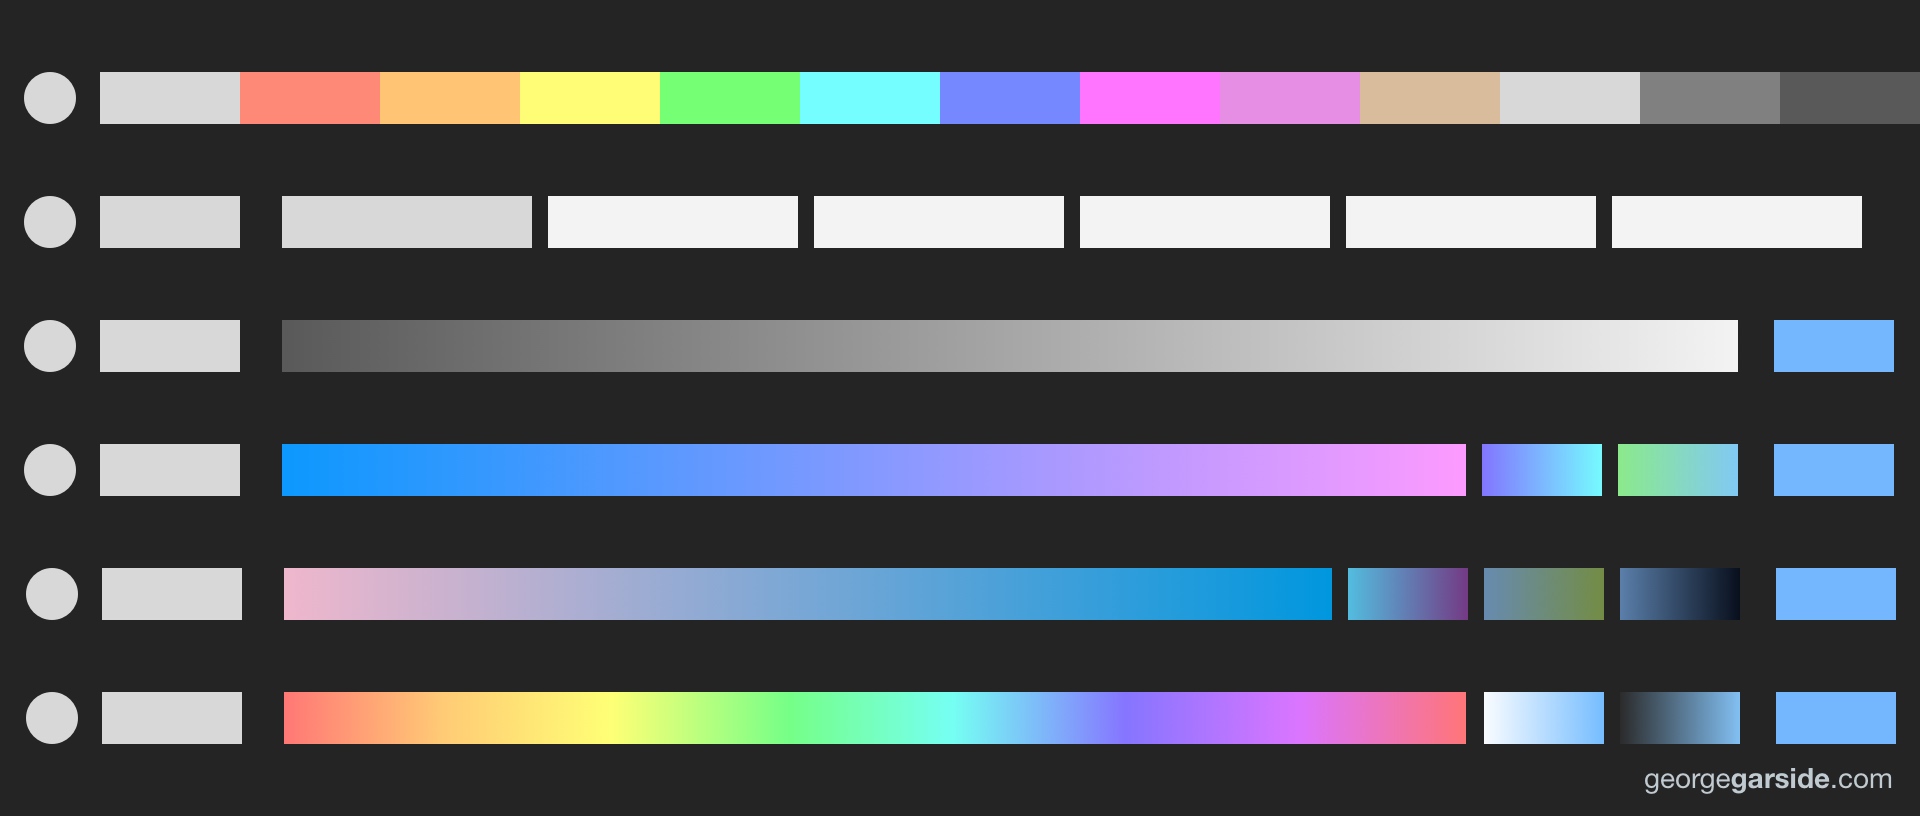
The Touch Bar colour picker has been greatly expanded with more functionality. Still here is the ‘simple’ view, with a number of preset swatch colours to choose from and the functionality of these are identical. All the new functionality is behind the button to the left. These changes are accessible systemwide in any app which supported the macOS colour picker previously.
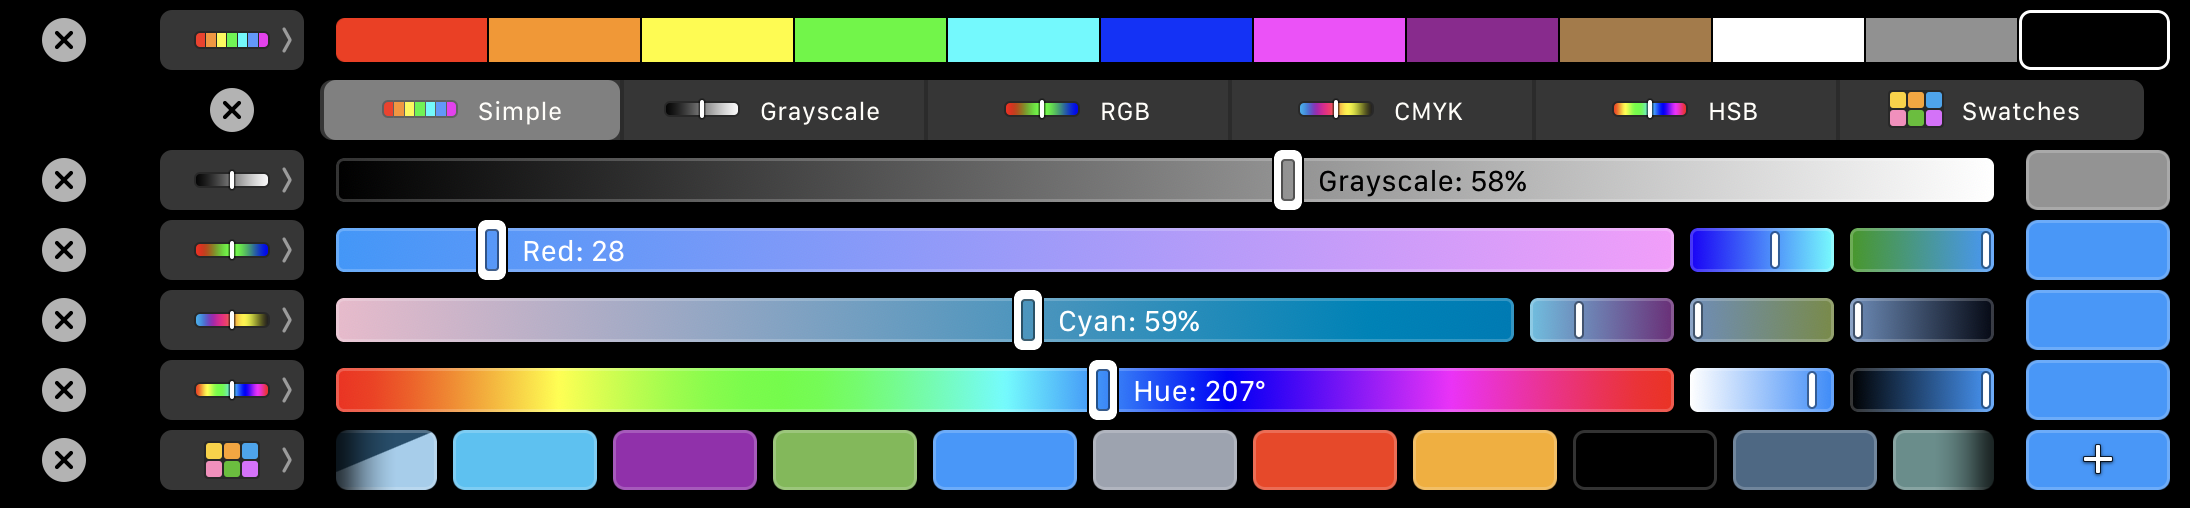
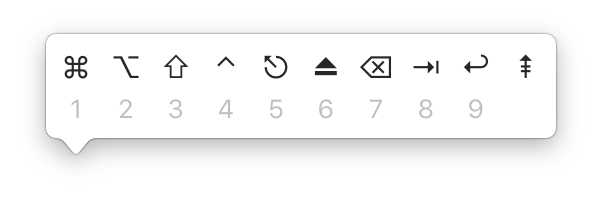
- Tapping the menu button (or holding and sliding) reveals a menu of different colour picker types to be shown on the Touch Bar. All the different types of sliders which are available in the colour picker on the macOS desktop are now available in the Touch Bar: Grayscale, RGB, CMYK and HSB.
- When any of these slider types are selected, the new sliders are shown; these sliders now show the exact numbers they are set at, for example the Red is set to 28 in the screenshot of the Touch Bar below — previously this information was only available by looking at the colour picker on screen if it was visible and set to the correct page, now it's always visible right on the Touch Bar, a much welcome improvement and makes Touch Bar colour selection much easier.
- The final selection is ‘swatches’, which presents a scrolling list of all the swatches that you've added to the list in the colour picker on the desktop. As demonstrated by the + icon on the right, the currently selected colour can be added to the swatches from this page, but another hidden feature is that a swatch can be added from any page: simply tap the colour shown on the right (i.e. any of the blue swatches in the Touch Bar rows on RGB/CMYK/HSB slider pages) to show the + button and tap again to add the swatch!
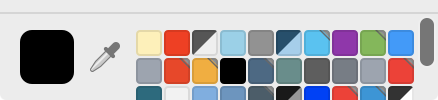
While we're here talking about the colour picker, on the desktop it now supports scrolling for more swatches. Prior to High Sierra, one could drag the bottom of the window in steps of 1 swatch row and ones off the window couldn't be accessed. Now, you can simply scroll the colour picker to view more swatches without extending the window.
Brightness and Volume
Faster access to simple adjustments of brightness and volume can now be performed with quick flicks left and right on the brightness or volume buttons in the control strip. This one's from the High Sierra beta release notes, so if you are a developer, you should be giving these a good read anyway! The swipe gestures work for the brightness and volume sliders regardless of whether they are accessed in the Control Strip or when they have been manually added to the expanded view through Touch Bar customisation.
PressAndHold.app
When using PressAndHold.app input method, i.e. holding down a key to show the popup to enter special characters, the options now appear in the Touch Bar. This is really useful: having customised the PressAndHold.app characters, the characters show directly in the Touch Bar and tapping a character inserts it. Unfortunately the bar doesn't scroll so it still only allows access to the first 9 items in the list. This is fine for the standard use of PressAndHold.app, but if you've customised it then you still can't access the other characters without multiple steps (using the ←left arrow to highlight the picker and then pressing ↩︎return).
Speaking of PressAndHold.app, its character viewer shown on screen now has a more cleaner design.
System Preferences.app
Significant Locations
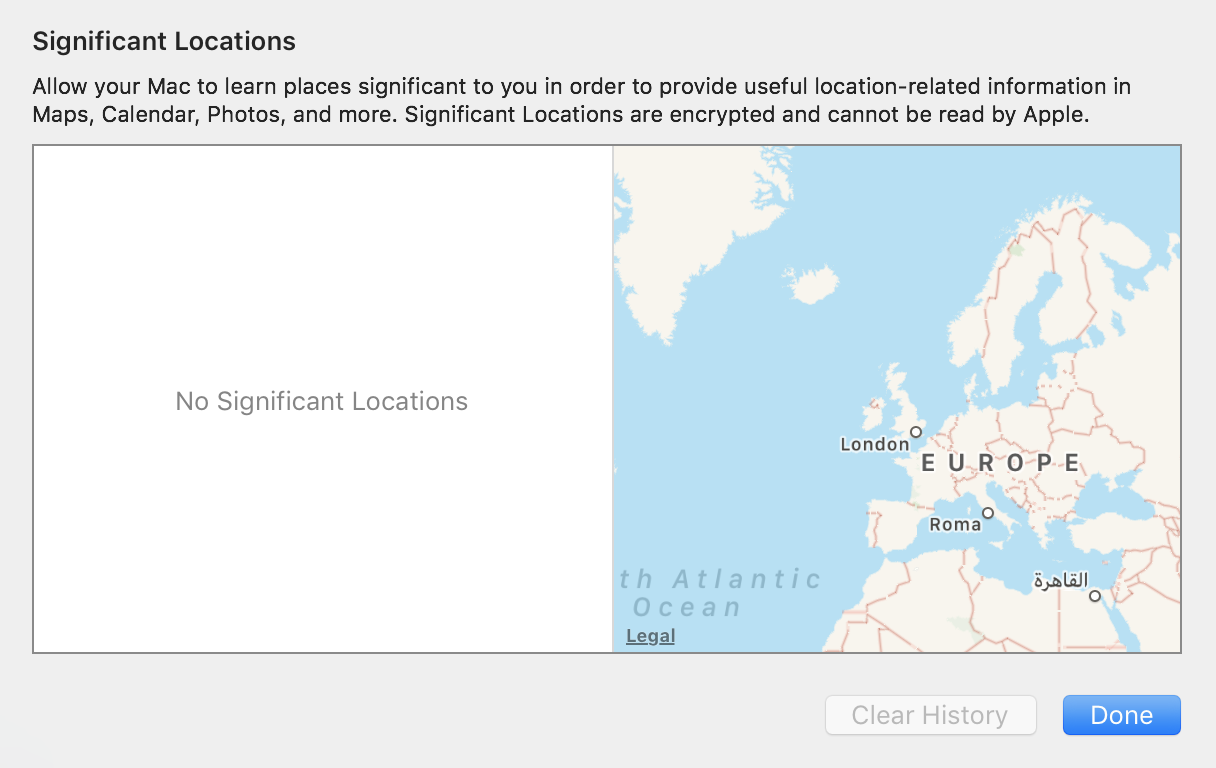
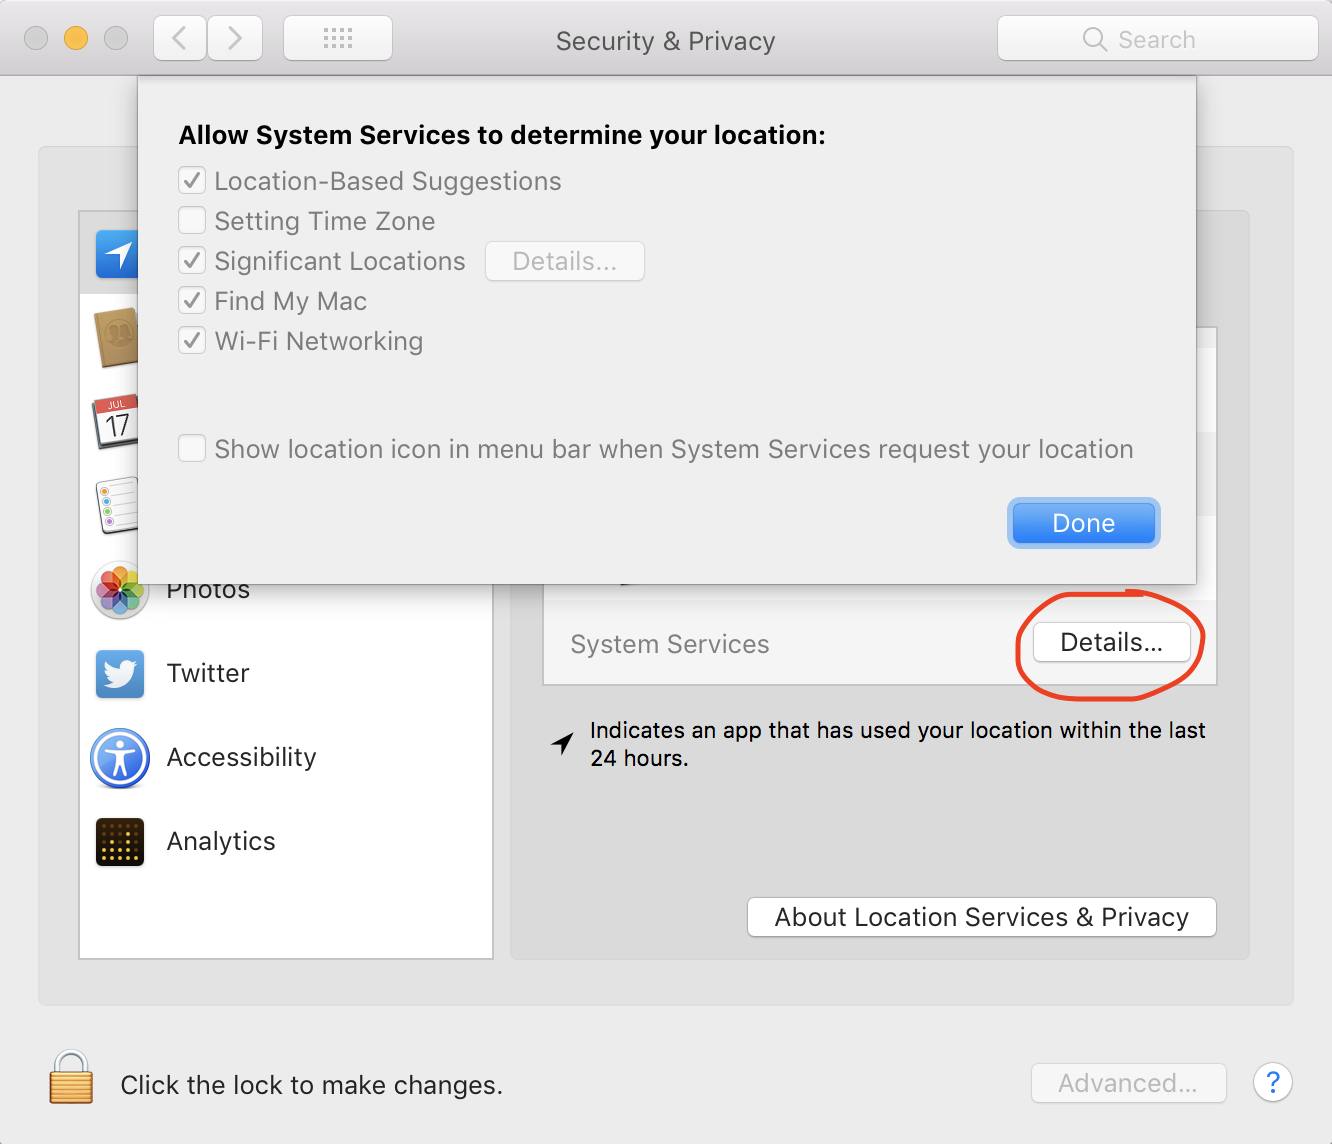
A new option in Privacy settings, available in Security.prefpane under Privacy → Location Services → System Services, is that of Significant Locations. This is a feature ported from iOS where it was called Frequent Locations prior to iOS 11. In iOS 11, the functionality was expanded to more actively add locations to the list, and it is unclear at the moment exactly how much functionality was ported to macOS High Sierra. To remove your Significant Locations, go to the location mentioned in System Preferences and click Clear History.
A minor UI tweak here is that the System Services details page in Location Services can now be opened without unlocking the preference pane. In prior versions of macOS, it was necessary to unlock the pane before even looking at the currently set options, as the Details button would be greyed out. Now, the button is no longer greyed out and can be clicked, showing the settings within, even if they can't be edited without unlocking the pane. This was something a user on Ask Different had difficulty with when turning off the Setting Time Zone location service as the button greyed out potentially indicated that the services were disabled.
UI tweaks
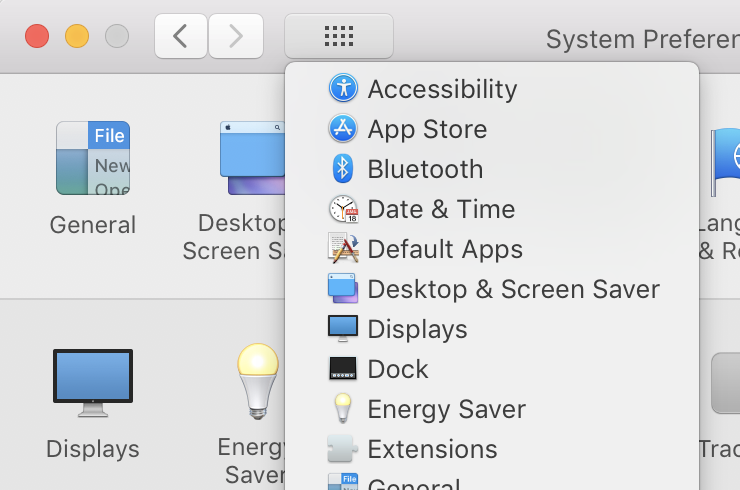
There's been another UI tweaks to System Preferences.app which you might not spot at first. The Show All button which looks a little different indicates added functionality: the button can be held to show a list of preference panes. The list of preference panes which appeared in the View menu in prior versions of macOS is now gone on opening System Preferences, but reappears later (which is probably a bug).
In the Siri preference pane (Speech.prefpane), the main switch for toggling Siri on/off has been renamed from Enable Siri to Enable Ask Siri. Siri is now mentioned in other places in the OS such as the Look up feature which now includes a ‘Siri Knowledge’ tab pulling content from various web locations.
Notes.app
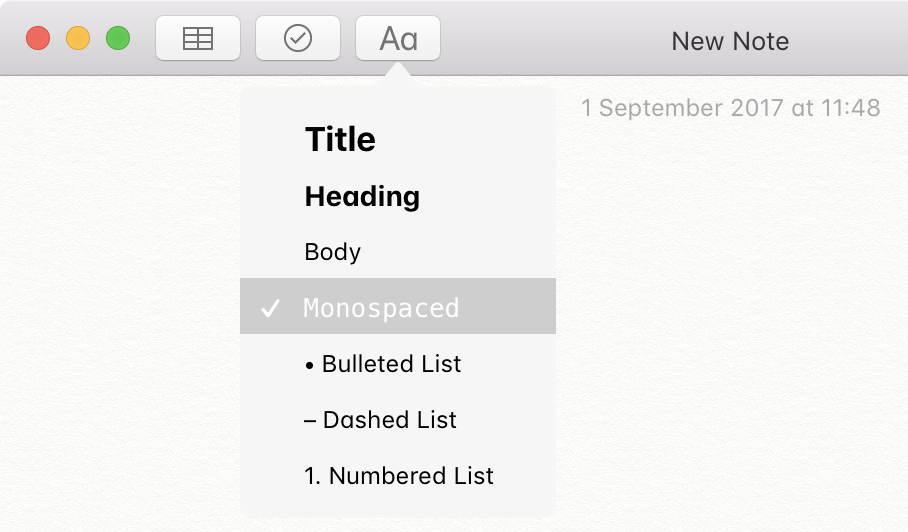
Monospaced font
In addition to the existing format types such as Title, Heading and Body, there is a new format named ‘Monospaced’. This format is a variation of the Body format but with a monospaced font family. The format can be accessed from the toolbar button or from the Format menu. Because formats apply to the entire paragraph, this isn't useful for inline code formatting, which would probably be a more likely use case for me, as full code snippets isn't really what Notes is for and is rather unsuitable. Also unfortunately the option isn't available from the Touch Bar format menu, which is probably the most disappointing thing not because this specific feature is missing from the Touch Bar but because it seems like Apple has already forgot the Touch Bar exists…

Finder.app
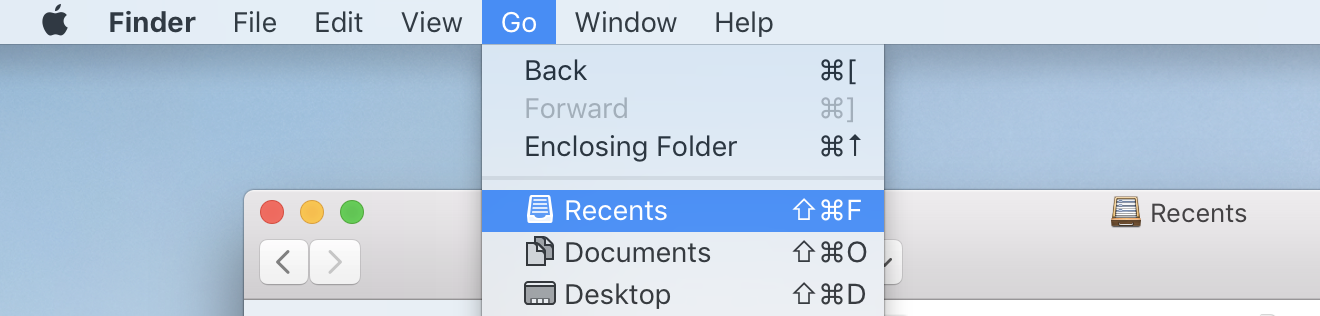
All My Files has been renamed to Recents, possibly to alleviate some confusion users had with where their files were stored and how Finder was accessing them. When All My Files came out, it was suggested that a possible reason was to continue the trend of moving macOS away from a filesystem-based interface, however the use of Recents seems to indicate a reverse of this. I'm happy about this; I've been in the situation of trying to explain the All My Files folder (and how it's not a folder) to users and this should make it easier to do that.
Safari.app
Reader
In the keynote, Apple spoke about the ability to always use Reader mode when available and that there are per-website settings, however it's also useful to note that quick access to set this functionality for a website is available when holding down the Reader button. The other option in this menu, Reader Website Preferences takes you to Safari Preferences → Websites → Reader where you can set your Reader preferences per website and view/change existing configuration for other websites. Also here are other per-website options condensed from other places in Safari Preferences to this one pane, such as Notifications.

Leave a Reply